Welcome to the Edge for Scholars! We’re glad to have you on board as sn Edition Administrator.
Below, you’ll find instructions for how to customize the look and feel of your edition, manage users and posts, and everything else you need to know.
Definitions
Here are the terms we use to describe things around the Edge.
Edition – A custom version of the Edge for Scholars made for your institution. Follow the link in the email you received to view your edition.
Edition Administrator – This is you! Edition Admins have the ability to customize their institution or group’s edition, to manage their edition followers, and edit or delete posts made to their edition and comments on those posts.
Edition Follower – A user who has subscribed to (“followed”) your edition. Anyone with an account is allowed to request to subscribe to your edition. You approve or deny each request.
Post – A blog post or article on the site. Anyone with an account can post to the main Edge for Scholars feed; only users who have followed your edition can post to your edition.
Public or Private Post – Posts made to editions can be marked public, which means they appear on the main feed as well as on your edition, or private, which means only followers of that edition can see it.
Logging in to the Dashboard
Log in with the user name and password you chose to be associated with your Edition Administrator role (generally the one associated with your university email account). One of our Super Admins or an Edition Admin at your university will have already given you administrative privileges.
At the top of your screen, you’ll see a small bar with a dashboard icon and “Edge for Scholars” at the top left. Hover over the words and you’ll see a dropdown with Dashboard. Click this.

Dashboard Link
The dashboard defaults to your profile. You care more about the sidebar.

Dashboard Sidebar
Setting Up Your Edition Profile
Click on Edition Profile in the sidebar. You should see a page that looks like this:

Edition Profile
You can change the edition name, description, edition image, and add default images on this page. When you’re finished, don’t forget to click the Save Changes button at the bottom!
Edition Description
Whatever you put in this box shows up in the sidebar of your edition’s feed like so:

Edition Description
It also becomes the text you see when you hold your mouse over your edition’s image on the Subscribe to Editions page:

Also the Edition Description
This description should be about two sentences, and should describe your program and/or content you offer on your edition so that users will want to subscribe. You can include links and make text bold or italic, but you must code anything like that in HTML.
Common HTML
- Make a link: <a href=”YOUR URL” target=”_blank”>Text you want to link</a>
- Bold: <b>Text you want bolded</b>
- Italic: <i>Text you want italicized</i>
Edition Image
You can upload an edition image (which will also appear in the sidebar of your edition and on the Subscribe to Editions page) by clicking Change Logo. A window for uploading your image will appear. Click the Upload Files tab on the top left.
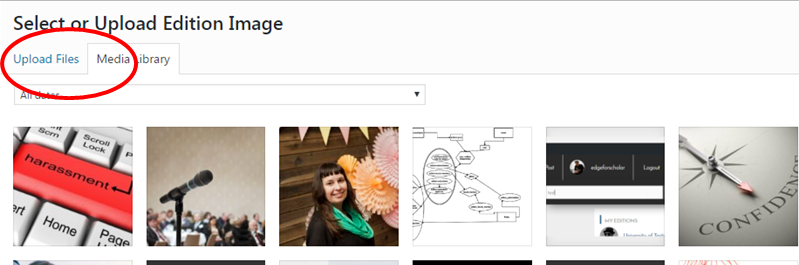
Upload Files Here
Once you have uploaded your image, it will appear in your Media Library tab. Click Select Edition Image at the bottom right to use it as your edition image.
When uploading an image, make sure of two things:
- The image size is 500×500 pixels (you may need to use an image editing program to make it the right size)
- Your image conforms to your institution’s branding standards. Many institutions will offer downloads of images that meet these standards; check with your branding, marketing, or equivalent office.
Default Edition Images
Uploading default images allows followers (users) who post to your edition to pick one for their posts. These images show in the left sidebar of the main and edition feeds:

Default Images on the Feed
Your followers can still upload their own images if they want to, but adding default images makes it easier for them to post. We have included a pack of default images to get you started. If needed, you can delete a default image by clicking the red “x” in the lower right of the image you wish to delete.
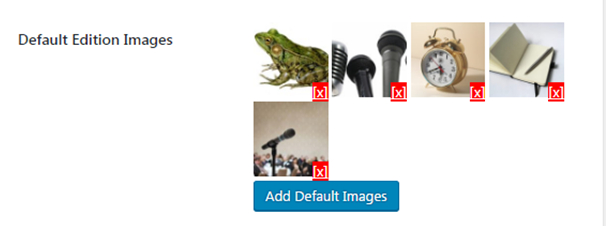
Adding and Deleting a Default Image
When uploading images, make sure of these things:
- Images are 600×420 pixels
- The images are either public domain, were bought from a stock photography site, or are images to which you or your institution holds the copyright
- No sexually explicit or overly violent images
Make sure to SAVE CHANGES before you leave the page!
Email Settings
Clicking the Email Settings tab in the sidebar allows you to customize the email an edition follower receives when they subscribe to your edition.
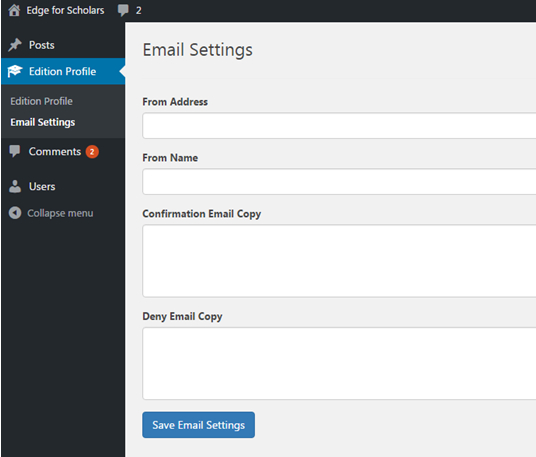
Email Settings
You can choose which email address it comes from and the sender name it displays. Text you put in the “Confirmation Email Copy” field is sent to those followers you approve. If you deny someone from following your edition, they will receive the text in “Deny Email Copy.” You can’t use HTML in your email copy, only plain text. The subject lines will always say “Your Subscription Has Been Approved” or “Your Subscription Has Been Denied.”

Approval Email
Users
Clicking on Users in the sidebar allows you to manage all the users who are following or who have requested to follow your edition.

User Pane
It defaults to viewing all, but you can choose to view only Edition Administrators or Edition Followers. You can also sort the list by Username or Email Address. In the top right corner, there is a search box you can use to find a specific user.
All users will be listed as either Pending or Approved.
To approve a pending user who has requested to follow your edition, click the blue Approve button. This will convert them to approved status and auto-send them the confirmation email you created above.
To deny them, click the gray Deny button. They will then disappear from your user list.
To unapprove a previously-approved user, click Unapprove. They will revert back to pending status, at which point you can deny them to make them disappear from the user list.

Approve and Deny Users
Posts
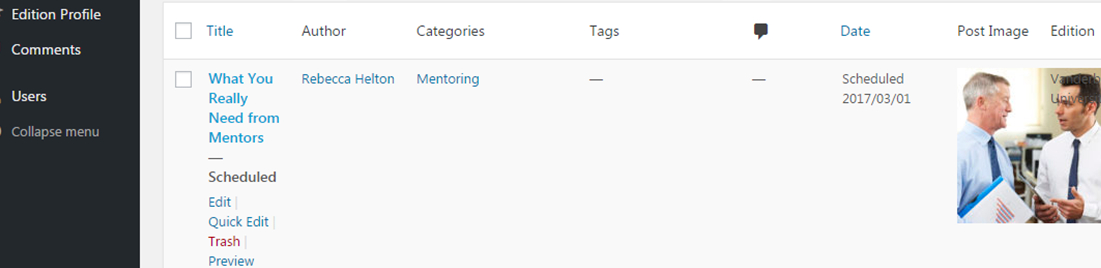
Clicking Posts in the sidebar will show you all the posts that have been made or scheduled to your edition. You can sort by post title and date. You can also filter by whether the post is yours and by whether it has been published or is scheduled to be published, as well as by whether it’s a sticky post, a draft, or in the trash. And you can use the search bar to find a particular post by title or any word in the text of the post.
Clicking on any word in the categories column filters to all posts using that category. Clicking on an author name filters to all posts by that author.

Posts Pane
Published means the post is visible on the site. Scheduled means the post is not yet visible on the site, but will become so at the day and time set (you can see this in the “date” column). Regular users don’t have the ability to schedule their posts; once they post, it’s available to the world. As an administrator, you can edit a post and change the time to a future date to schedule it. (More on that later.) Sticky is not an option available to edition administrators, so don’t worry about it.
Clicking on the title of a post takes you editing page for that post. Hovering over the title will give you options to edit, trash, or preview the post. (You can do all this from the editing page as well.)
Post Options
If you need to hide a post but don’t want to trash it (i.e., you need someone else to approve it first), click the dropdown under Post Status and set to “Set Pending.” If you would like to make a post a user marked public (appears in the main feed with a colored bar indicating it came from your edition) private so that only people subscribed to your edition can see it, select the dropdown under Private to Edition. This works the other way, private to public, as well, for posts you think need more publicity.

Hide a Post
Trash a post but didn’t mean to? You can fix it! Just click on Trash at the top and then Restore the post.
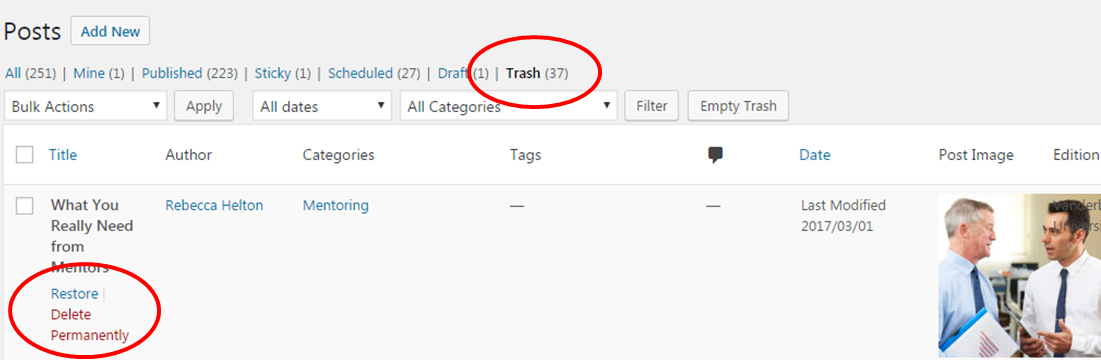
Restore a Post
Comments
Clicking Comments in the sidebar will show you all comments that have been made to posts made to your edition. You can sort by author, the post a comment is in response to, and the date/time it was submitted. You can also use the search bar to find a particular comment.

Comments Pane
Hovering over any comment row will show you several options under the text of the comment.
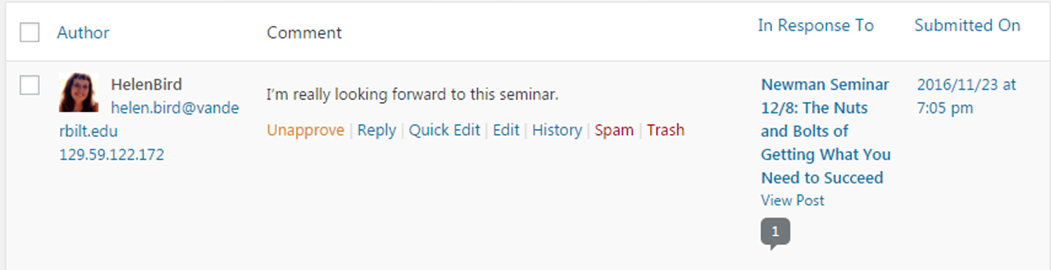
Comments Options
Unapprove will hide the comment from view by all users, but keep it in your comments list so you can edit or re-approve it. (The word “Unapprove” will change to “Approve” when you click it; approving a comment will un-hide it.)
Reply allows you to reply to the comment in this window, without going back to the post.
Quick Edit allows you to edit the comment without leaving the window, while Edit takes you to a new window and gives you a few more options, including the ability to mark it as spam. It also gives you a history of the comment’s approval status.

Edit Comments Window
Spam removes the comment from view and moves it to the Spam folder (the number of items in your Spam folder will increase). You can restore a comment by clicking on your spam folder and choosing “Not Spam.” You can also delete it permanently.
Trash removes the comment from view and moves it to the Trash folder. Clicking into the Trash folder allows you to restore the comment or delete permanently.
If you just want to see all the comments for a particular post, click on the speech bubble with a number in it under the post you’re interested in.

View Comments for a Specific Post
Editing Posts
You may wish to edit posts in your edition. To do this, either visit the post and click Edit Post at the very top left, or click the title of the post in the Posts section of your dashboard.
You can change the text, fix broken links, change images, add or delete categories, change the featured image, and basically do everything you could if you were posting yourself. You can also move the post to the trash and schedule the post for a future date. To trash, just click “Move to Trash” in the Publish box at the top right. To schedule a post, click the word Edit next to the Publish On date and put in a future date and time.

Schedule a Post
Click OK and then Publish or Update (the blue button will change to Update if you schedule it for the future).
That’s all for now–feel free to ask questions in the comments.